DIY Board and Batten
So excited to share our master bedroom renovation and show you how to install board and batten for your next DIY project! We have been without a headboard for so long, and since I can’t make a decision, we thought it would be a great idea to do an accent wall. Read along to see how we did it!
Disclosure: The links provided may be affiliate links. That means by shopping these links, we make a small commission at no extra cost to you! We only promote what we actually use. :)
Repose gray is throughout our home, and I seriously can’t say enough great things about this perfect shade of paint by Sherwin Williams. As we installed the board and batten, it just felt like we were still missing that WOW factor. I have been DYING to try a dark paint color and thought, you know what? I’m doing it. Here. Now. And it’s going to be black. Troy is not a fan of dark paint but he trusted me, and he loves the end result! Ok, let’s get to it.
Materials
1x4 Primed Pine for the Vertical Boards
1x5 for the Middle, Horizontal Board (length will depend on the length of your wall)
1x6 for the Top Board (length will depend on the length of your wall)
1x4 Common Board for the shelf (length will depend on the length of your wall)
Caulk and Caulking Gun
Paint
When picking out your boards, try to find the STRAIGHTEST boards possible! Hold the board leaning on the floor and on its side. Look down the side of it to check for any curves.
Tools
Chop Saw/Miter Saw
Orbital Sander/ Sanding Block
Level
Square
Nail Gun and 1 1/4” 18 gauge Finishing Nails or Hammer and 1 1/4” Trim Nails
Tape Measure
Measurements: Spacing your Board and Batten
First step is to measure the height of the wall and mark how high you want the board and batten. We went with 2/3 of the way up. After making a few marks I taped a line and primed the lower portion. If you’ve got your paint colors picked out, go ahead and paint the top portion now (I changed my mind mid way through, haha!).
This is the tricky part. I knew that I didn’t want a center board, I wanted a center “panel”. Start by measuring the width of your wall. I envisioned 4 vertical boards, giving me 5 “panels”. I took the actual measurement of a 1x4 which is 3.5” and multiplied that by 4 (3.5” x 4 boards = 14”). I subtracted that from the width of my wall. Then I took my answer and divided it by 5 (5 panels) and that gave me my spacing for the boards!
There are a couple of ways you could figure out the length of your 1x4 boards. Check to see if your floor molding is level. If NOT, mark a level line where you want the bottom of the horizontal 1x5. Measure down to the floor molding in each area where a 1x4 will go. “Measure twice, cut once!” If your floor molding is level, you could set up a jig on the chop saw like we did to ensure every 1x4 is cut the same exact length.

As you cut each 1x4, tape them on the wall using your measurements we figured out earlier. Just double check that everything looks good, adjust if necessary and make final marks on the wall before taking them down to glue!
As you get ready to install your vertical boards, have the liquid nails and a square or level handy, as well as a nail gun (or you can manually hammer in small trim nails - fun stuff). Glue the back of your first board, and put it into place. Before nailing, check for straightness by using a level or a square in the corner (we did both. Can’t be too careful!). Nail away!

Staying level is extremely important, so keep checking as you go! When you move to the next board, use a level across the top of the vertical boards like the top right photo. Adjust as necessary. You might have to squeak your next piece a bit higher, or cut it a bit shorter (this is why setting a jig on your chop saw is helpful, and of course starting with level floor molding). Once your verticals are in, lay your first 1x5 horizontal piece on top and secure with liquid nails and nails.

I’m so mad I didn’t get a picture of the next step. I thought it was genius, haha! Now you’ve got your shorter vertical boards cut to whatever length you decided ready to go on top of the horizontal board you just installed. I placed one on top of the 1x5 horizontal board and used the square to make sure it was lined up properly. Take the square and put the straight side with the lip all the way against the bottom of your horizontal board. The other side of the 45 should go alongside your vertical piece. You should be able to line them up flawlessly! Do this for the rest of your vertical pieces and finally, glue and nail your 1x6 board on top.

Time to fill all the nail holes, sand any imperfections, and caulk the edges. Once all that is done, put on your final coat(s) of paint. Tip: Instead of using wood filler in your joints, use caulk to fill any small gaps. It will allow the wood to expand and contract… wood filler will crack!

This is the point when I called Troy at work and said “are you going to kill me if I paint the wall black?” Haha! If you’re changing your mind about the top third of the wall, paint it now.
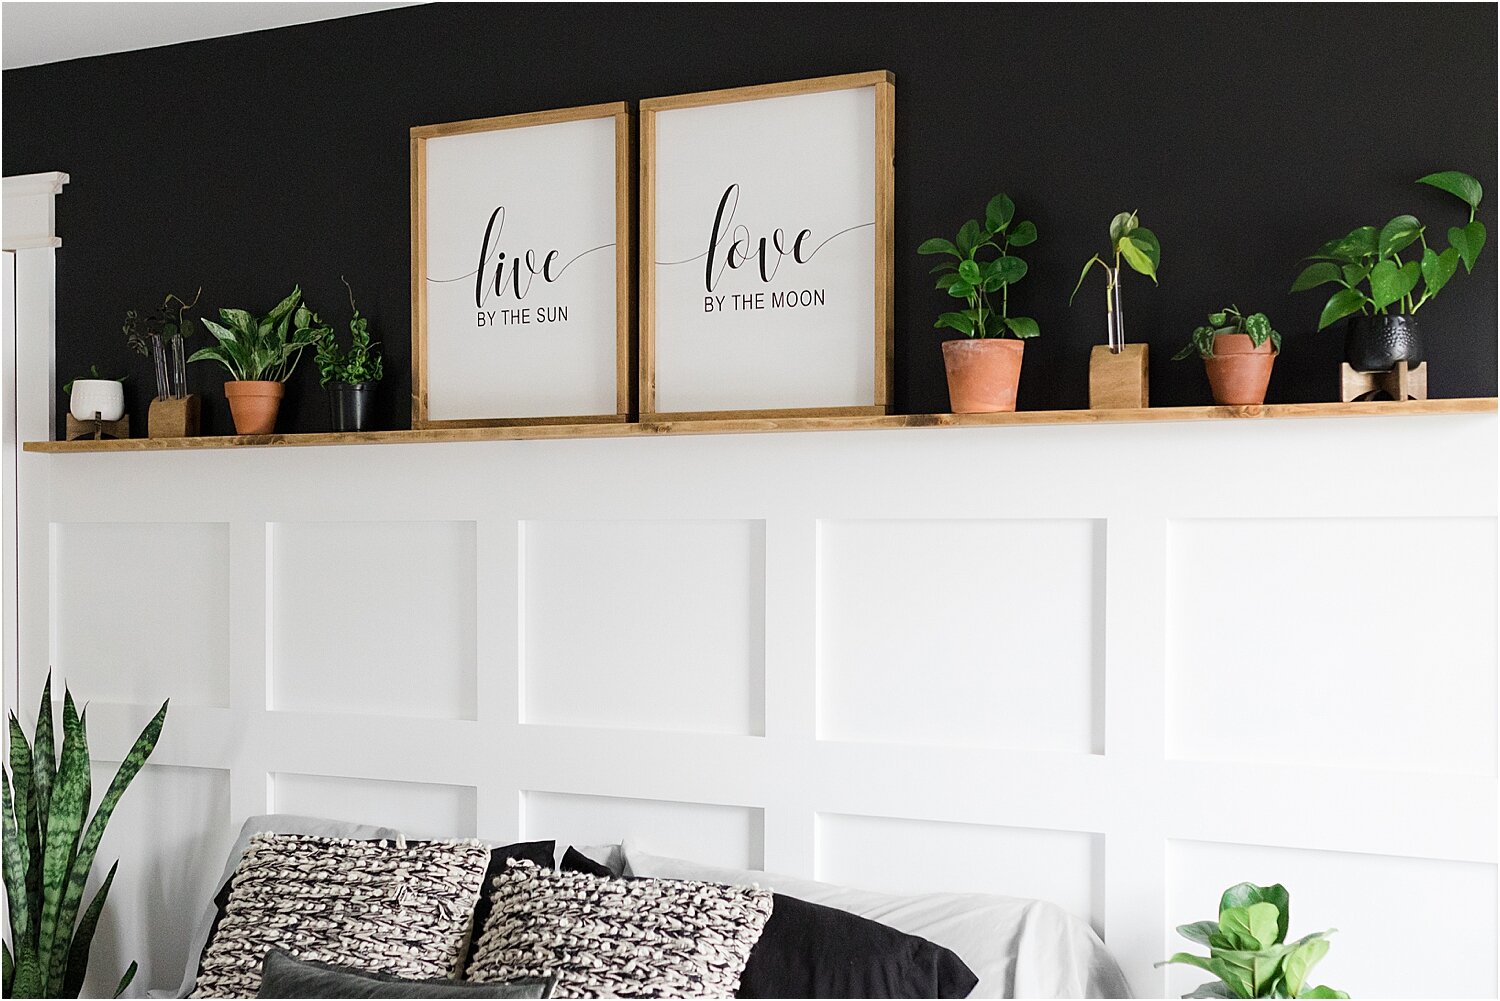
We have been undecided this whole time about putting a white ledge on top to finish off the board and batten or staining a deeper shelf. Something just kept pulling me towards staining a ledge and making it deeper than your typical 1x2. I finally made the decision to do a 1x4 to fit my small potted plants and stained it in Early American. Simply cut to size, sand, stain, seal, let dry, and place the board on top and screw down. This is EXACTLY what I had envisioned! Everything about this was a risk. How was this going to come out with such crooked walls? Dark paint? Stain the ledge? Not your typical board and batten but I am OBSESSED! Now for some new bedding. And pillows. If the kids would stop stealing ours, that would be greeaaattttt.

Let us know if you have any questions and have fun!
Troy + Julia

Love it?! Pin it!